Water Softener Installation: How to Install a Water Softener Step by Step
Last updated: November 9, 2026 · Always follow your softener’s manual and local plumbing code
For a water softener installation, you shut off the main water supply, cut into the main line after the outdoor faucet branch and before the water heater, connect the softener through a bypass valve, run the drain line to a floor drain with an air gap, plug it in, add salt and program it. A handy homeowner can do it in about 3 to 6 hours. A plumber usually takes 2 to 4 hours.
This step-by-step guide covers where to put your softener, the tools you need, how to connect it, and the mistakes that cause leaks. Every softener is a little different, so keep your manufacturer’s manual open as you work.
Installation at a glance
- Time: 3 to 6 hours for DIY; 2 to 4 hours for a plumber
- Skill level: moderate; you will cut and join water pipes
- Location: on the main line, after outdoor faucets, before the water heater
- You need nearby: a drain, an electrical outlet and a level floor
- Cost: professional installation usually adds $150 to $1,000

Before You Start: Choose the Right Location
Where you put the softener matters as much as how you connect it. A good spot has:
- Access to the main water line where it enters your home, usually in a garage, basement or utility room.
- A position before the water heater, so hot water is softened too and the heater is protected from scale.
- A position after the outdoor faucet branch, so you don’t waste softened water and salt on the lawn and garden.
- A drain nearby, such as a floor drain, laundry standpipe or utility sink.
- An electrical outlet for the control valve.
- A level, solid floor that won’t freeze and isn’t in direct sunlight.
On a private well, install the softener after the pressure tank. If your water has sediment, add a sediment filter before the softener to protect it.
Water Softener Installation Requirements
Check these before you buy parts. They decide where the softener can go and whether a DIY install makes sense.
- Location: on the main line where water enters the home, after the branch to outdoor faucets and before the water heater, on a level floor.
- Drain: a floor drain, laundry standpipe or utility sink close by for the regeneration discharge, with an air gap.
- Power: a standard 120-volt outlet that is not on a light switch. Most control valves use a plug-in transformer.
- Water pressure: most residential softeners are rated for roughly 20 to 120 psi. Check your manual, and add a pressure reducing valve if your pressure is higher.
- Temperature: a spot that stays above freezing and out of direct sun. Never put a softener after the water heater.
- Pipe size: match the softener’s 3/4-inch or 1-inch connections to your main line with the right fittings.
- Local rules: some areas require a plumbing permit or a licensed plumber, and a few California communities restrict salt-based softeners. Check with your city or county first.
Water Softener Installation Diagram

The order matters. Outdoor faucets stay on hard water so you do not waste salt on the lawn, and the softener sits before the water heater so the heater is protected from scale. On well water, a sediment filter goes in front of the softener, and any iron filter or acid neutralizer goes before it too.
Tools and Materials
| Tools | Materials |
|---|---|
| Pipe cutter (copper or PEX) | Water softener and brine tank |
| Adjustable wrenches | Bypass valve (often included) |
| Tape measure and marker | Fittings: push-to-connect, PEX or soldered copper |
| Bucket and towels | Flexible connectors, if allowed by your manual |
| Deburring tool | Drain tubing and hose clamps |
| Torch and solder (copper only) | Thread seal tape |
| Hardness test strips | Grounding clamp and wire, if your pipes are metal |
| Level | Softener salt |
How to Install a Water Softener: Step by Step

Step 1: Shut off the water and drain the lines
Turn off the main water valve. Open the lowest faucet in your home to drain the pipes, then turn off your water heater (set gas heaters to “vacation” or switch off the breaker for electric heaters) so it doesn’t run empty.
Step 2: Set the softener in place
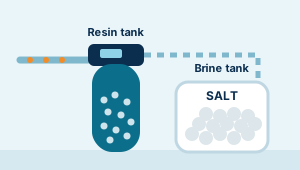
Put the resin tank and brine tank where they will stay, close to the main line, drain and outlet. Check that both sit level. Moving a full brine tank later is hard.
Step 3: Attach the bypass valve
Connect the bypass valve to the softener’s control head, following the manual. The bypass lets you send water around the softener for repairs or for maintenance without shutting off the whole house.
Step 4: Cut into the main line
Measure where the inlet and outlet pipes will connect, then cut the main line with a pipe cutter. Have a bucket and towels ready for leftover water. Deburr the cut ends.
Step 5: Connect the inlet and outlet
Run a pipe from the main line (the incoming, unsoftened side) to the softener’s inlet, and from the softener’s outlet back to the line that feeds the house. Look for the flow arrows on the valve. Reversing inlet and outlet is one of the most common mistakes.
Soldering copper? Do all soldering away from the softener’s plastic valve and bypass, and let joints cool before connecting. Heat can melt plastic parts and void the warranty.
Step 6: Install a grounding jumper
If your home uses metal water pipes as part of the electrical ground, cutting the pipe and adding a plastic softener valve can break that ground path. Clamp a grounding jumper wire across the gap, from the pipe on one side of the softener to the pipe on the other. If you are not sure, ask an electrician.
Step 7: Connect the drain line
Attach drain tubing to the softener’s drain fitting and secure it with a hose clamp. Run it to a floor drain, laundry standpipe or utility sink. Leave an air gap between the end of the tube and the drain. Plumbing codes require this so dirty drain water can never be siphoned back into your water.
Never push the drain line directly into the drain pipe or below the water level of a sink. Without an air gap, wastewater could flow back into the softener.
Step 8: Connect the brine tank overflow
Most brine tanks have an overflow fitting. Connect a separate tube from it to the drain. This line works by gravity, so it must run downhill and should not be joined to the main drain line.
Step 9: Turn the water back on slowly
Put the bypass valve in the bypass position. Turn the main water back on and check for leaks. Then move the valve partway toward service to let water slowly fill the resin tank, which pushes out trapped air. Open a cold faucet to release air from the lines. Check every joint again.
Step 10: Add water and salt to the brine tank
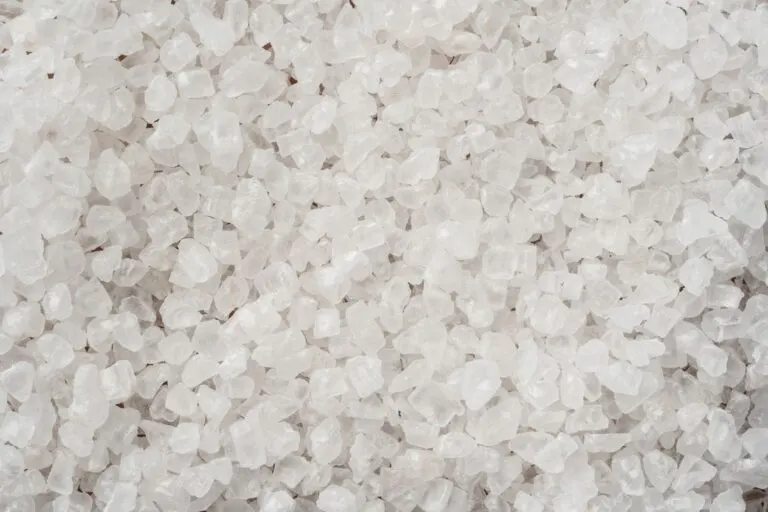
Add the amount of water your manual says (some softeners fill the brine tank themselves), then fill the tank with softener salt. Keep the salt level a few inches above the water.
Step 11: Plug in and program the softener
Plug in the control valve and set the time of day, your water hardness in grains per gallon, and the regeneration time, usually around 2 a.m. when no one uses water. If your water has iron, many manuals tell you to add extra grains for each part per million of iron. Not sure of your hardness? Use our guide on how to test water hardness at home.
Step 12: Run a manual regeneration and test
Start a manual regeneration to flush the new resin and check the drain line works. Turn your water heater back on. After a day, test water from an indoor cold tap. Softened water should read close to 0 to 1 grain per gallon.
Common Installation Mistakes to Avoid
- Reversing the inlet and outlet connections
- Installing after the water heater, which leaves hot water hard
- Softening outdoor faucets and wasting salt on watering
- No air gap on the drain line
- Soldering too close to plastic valve parts
- Forgetting the grounding jumper on metal pipes
- Entering the wrong hardness, which wastes salt or leaves water hard
- Kinked drain or overflow tubing that stops water from draining
Water Softener Installation Cost
If you hire a pro, professional water softener installation typically adds about $150 to $1,000 to the price of the unit, according to Angi. A straightforward swap where plumbing, drain and power are already in place sits at the low end. New plumbing runs, a new drain line, a loop installed in a new home or extra stages such as an iron filter push it higher.
- DIY installation: mainly the cost of fittings, a bypass valve if not included, tubing and tools, usually under $100 to $200 if you already own basic tools.
- Standard softener installed by an independent plumber: roughly $1,030 to $1,800 for unit plus labor.
- Dealer-installed systems: often much more, because the price includes the brand, service and sometimes financing.
See the full breakdown in our water softener cost guide.
DIY or Hire a Plumber?
| DIY installation | Professional installation | |
|---|---|---|
| Cost | Tools and fittings only | Usually $150 to $1,000 extra |
| Time | 3 to 6 hours | 2 to 4 hours |
| Risk | Leaks if joints are done poorly | Low; work is usually guaranteed |
| Warranty | Some brands require a pro install | Keeps the warranty valid |
| Best for | Easy access, simple plumbing, experience with pipes | Tight spaces, no nearby drain or outlet, permits needed |
Some cities require a permit for this work, and a few restrict salt-based softeners entirely. Check with your local building department first. For a full price breakdown, see our guide to water softener cost.
Frequently Asked Questions
Where should a water softener be installed?
Install it on the main water line where it enters the home, after the branch to outdoor faucets and before the water heater. It needs a nearby drain, an electrical outlet and a level floor that won’t freeze.
Can I install a water softener myself?
Yes, if you can cut and join water pipes and your local code allows it. Expect 3 to 6 hours. Hire a licensed plumber if your plumbing is complicated, there is no nearby drain, or your warranty requires a pro.
Does a water softener need a drain?
Yes. A salt-based softener flushes minerals and brine down a drain during regeneration. The drain line needs an air gap so wastewater can’t flow back into the system. Salt-free conditioners usually don’t need a drain.
Should outdoor faucets get softened water?
Usually not. Watering lawns and washing cars with softened water wastes salt, and the extra sodium is not good for plants. Most installers leave outdoor faucets on the hard water line.
How long does it take to install a water softener?
A plumber usually needs 2 to 4 hours for a standard install. A DIY install typically takes 3 to 6 hours, longer if you need to run new pipe, a drain line or an outlet.
How much does water softener installation cost?
Professional installation usually adds about $150 to $1,000 to the price of the softener, depending on how much new plumbing, drain work and electrical work is needed. A DIY install mainly costs fittings and tubing.
Do you need a permit to install a water softener?
It depends on where you live. Some cities and counties require a plumbing permit or a licensed plumber for work on the main water line, and a few California communities restrict salt-based softeners. Check with your local building department before you start.
The Bottom Line
Installing a water softener comes down to the right location, correct inlet and outlet connections, a proper air gap on the drain and the right hardness setting. If you are comfortable with plumbing, it is a manageable weekend job. If not, a plumber can do it in a few hours. Learn more in our complete guide to water softeners.
Related: Water softener cost · How to test water hardness · Softener vs conditioner